3 Inch Body Lift Installation
by: David Meisner
|
page
2
Jack Up Your Truck:
A Collection of Useful Body
Lift Tricks
By: Mat Riddle
|
The article and all photos were submitted to Explorer4x4.com by David Meisner.
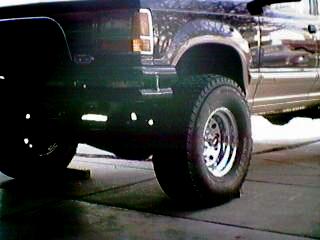 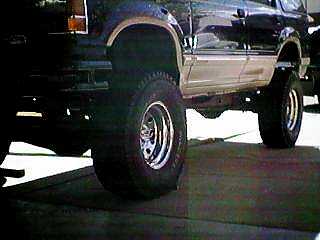
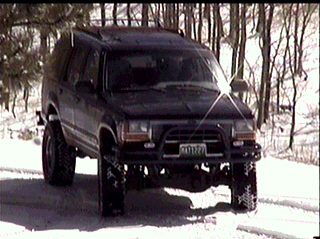
'92 Explorer before and after the 3" body lift
WARNING TO DRIVER
This vehicle has been modified by installation of a lift kit
and has unique handling characteristics. Because of the higher center of
gravity and larger tires, this vehicle handles and reacts differently both
on and off-road than a passenger car.
Requirements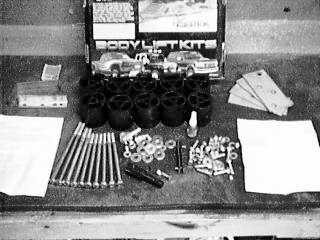
'92 Explorer with 5 Speed Transmission
Dick Cepek 3" Body Lift Kit - Part Number DCB793
Dick Cepek Shifter Extension - Part Number DCB3700
(The Dick Cepek kit is basically a relabeled Performance Accessories
kit)
Time Required Away From
Significant Other
6 hrs. average
Installation Preparation
Park vehicle on level surface. Block the front and rear wheels so the
Explorer won't roll.
Remove the front and rear bumpers.
Remove the connecting bracket from the parking brake cables (this is
the metal bar connecting the cables underneath the drivers door). Pull
the cable towards you and then slide the cable off of the bracket. Remove
the cable from the body frame mount.
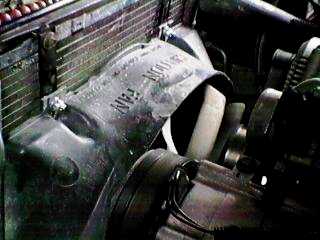
Remove the air intake duct from the engine and air box.
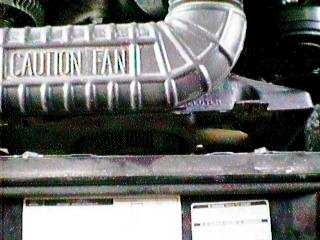 Remove the upper
fan shroud bolts. Lift the fan shroud up to remove from the lower mounting
clips. Allow the fan shroud to rest out of the way on the fan and engine. Remove the upper
fan shroud bolts. Lift the fan shroud up to remove from the lower mounting
clips. Allow the fan shroud to rest out of the way on the fan and engine.
Inspect all of the wiring, hoses and cables that connect the engine
to the body.
Pull the brake lines free from the mounting clips on the frame rail
just below the master cylinder.
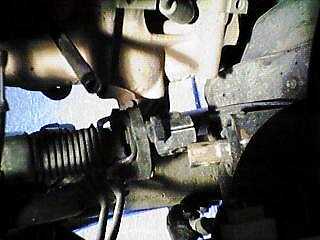 Mark
the upper steering shaft where it connects to the lower steering shaft.
The is for proper alignment after reinstallation. Remove the bolt that
connects the shafts together. Slide the intermediate shaft down and off
of the upper keyed shaft. Mark
the upper steering shaft where it connects to the lower steering shaft.
The is for proper alignment after reinstallation. Remove the bolt that
connects the shafts together. Slide the intermediate shaft down and off
of the upper keyed shaft.
Inspect the wiring harness and cables that connect to the transfer case
or transmission. Disconnect if necessary.
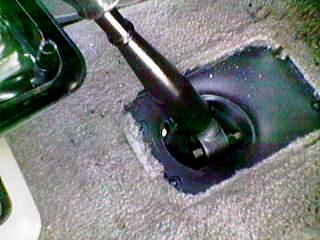
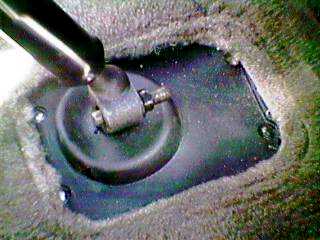
Remove the four screws that mount the shift boot to the floorboard.
Pull the boot up to reveal the bolt and wedge stud that attach the upper
shift lever to the lower shift lever. Remove the nut from the front side
of the wedge stud.
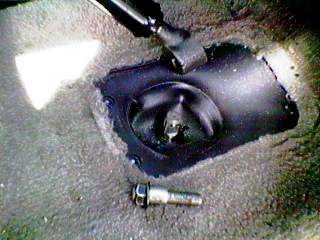
Install the nut on the back side of the wedge stud. Tighten the nut
to remove the stud. After the stud has been removed slide the upper shift
lever off of the lower shift lever.
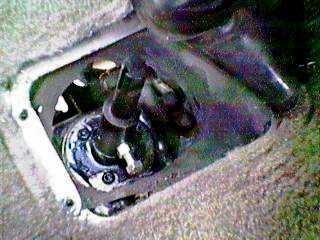 Install
the shift extension on the lower shift lever. Insert the 1/8"x1/2" roll
pin in the hole in line with the slot on the extension. Install the nut
on the bolt with the nylon toward the head of the bolt. Align the roll
pin with the slot on the side of the lower shift lever. Slide the shift
extension on to the lower shift lever. Insert the bolt and nut assembly
into the threaded hole on the extension. The hole should be aligned with
the flat milled area at the top of the lower shift lever. Tighten the bolt
securely. After the bolt has been tightened, tighten the nut against the
extension. Install
the shift extension on the lower shift lever. Insert the 1/8"x1/2" roll
pin in the hole in line with the slot on the extension. Install the nut
on the bolt with the nylon toward the head of the bolt. Align the roll
pin with the slot on the side of the lower shift lever. Slide the shift
extension on to the lower shift lever. Insert the bolt and nut assembly
into the threaded hole on the extension. The hole should be aligned with
the flat milled area at the top of the lower shift lever. Tighten the bolt
securely. After the bolt has been tightened, tighten the nut against the
extension.
 Install
the upper part of the shift lever onto the extension. Install the wedge
stud through the slot on the extension. Install the nut on the front side
of the wedge stud. Tighten until the lever is securely in place. Install
the upper part of the shift lever onto the extension. Install the wedge
stud through the slot on the extension. Install the nut on the front side
of the wedge stud. Tighten until the lever is securely in place.
Remove the door jamb kick plate mounting screws from both sides of the
explorer. Remove the kick plates and panels. Remove the screws and kick
plate from the rear hatch to expose the rear mounting bolts..
 Remove the four
mounting bolts from the bottom of the front seat tracks. Do this for both
the driver and passenger seats. Lift the outside of the seat and tuck the
edge of the carpet under the seat out of the way. This exposes the body
mounting bolt covers in front and behind the front seats. Remove the mounting
bolt covers. Remove the four
mounting bolts from the bottom of the front seat tracks. Do this for both
the driver and passenger seats. Lift the outside of the seat and tuck the
edge of the carpet under the seat out of the way. This exposes the body
mounting bolt covers in front and behind the front seats. Remove the mounting
bolt covers.
Fold the rear seats down and lift the cover panel to expose the mounting
bolts in the front of the rear deck. Remove the mounting bolt covers.
 Loosen the five
body mount bolts from the driver side of the explorer until the bolt is
no longer exposed from the mounting nut. Remove the body mount bolts from
the passenger side of the explorer. Loosen the five
body mount bolts from the driver side of the explorer until the bolt is
no longer exposed from the mounting nut. Remove the body mount bolts from
the passenger side of the explorer.
Lift Block Installation
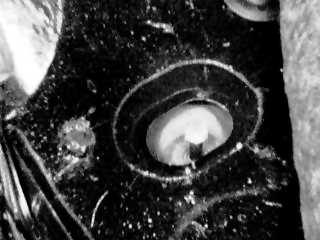
 Using a wooden
block and a hydraulic jack, lift the passenger side of the explorer. Constantly
check for any binding wires, cables or hoses. Remove the front bushing
and sleeve from the frame. Drill out the threaded portion of the bushing's
sleeve with a 1/2" bit. Using a wooden
block and a hydraulic jack, lift the passenger side of the explorer. Constantly
check for any binding wires, cables or hoses. Remove the front bushing
and sleeve from the frame. Drill out the threaded portion of the bushing's
sleeve with a 1/2" bit.
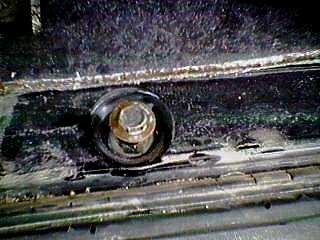
Replace the bushing and sleeve onto the body frame mount. Place the
five lift blocks onto each of the body mount bushings. Install the new
body mounting bolts but do not tighten. Be sure and re-use the stock large
washers for the three innermost body mounting bolts. There are three lengths
of bolts. The largest bolt goes in the rear of the rear deck. The next
largest bolt goes in the front of the rear deck. The other three bolt are
the same size. Lower the hydraulic jack.
Repeat the above step for the driver side of the explorer.
Measure the distance between the frame rail and the fender wall both
front and back. Adjust the position of the cab until it is centered on
the frame. Tighten all ten of the body mounting bolts and replace the bolt
covers.
Closing Out The Project
Reposition the carpet and install all kick panels and plates. Reposition
the front seats over the mounting holes and bolt securely.
Reinstall the shift boot assembly by tightening the four mounting screws
securely.
 Install the
upper fan shroud drop down brackets to the radiator using the stock bolts.
Bolt the top of the fan shroud to the new drop down brackets. Place a small
piece of rubber insulation between the bracket and the radiator to prevent
any vibration damage. Install the
upper fan shroud drop down brackets to the radiator using the stock bolts.
Bolt the top of the fan shroud to the new drop down brackets. Place a small
piece of rubber insulation between the bracket and the radiator to prevent
any vibration damage.
 Using a self
tapping screw, mount the top of the lower fan shroud bracket to the lower
radiator support. Drill a hole in the bottom of the fan shroud and bolt
securely to the lower fan shroud bracket. Ensure that the fan shroud is
isolated enough from the fan and positioned appropriately. Using a self
tapping screw, mount the top of the lower fan shroud bracket to the lower
radiator support. Drill a hole in the bottom of the fan shroud and bolt
securely to the lower fan shroud bracket. Ensure that the fan shroud is
isolated enough from the fan and positioned appropriately.
Reinstall the air intake duct.
Re-install the front and rear bumpers. You can use any type of filler
material to cover the gaps between the body and the bumpers. Use the supplied
bumper brackets if needed. These brackets are not meant for any purpose
other than looks.
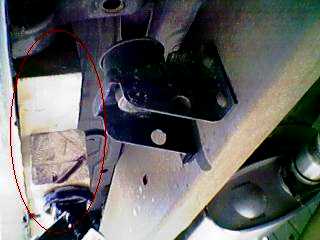
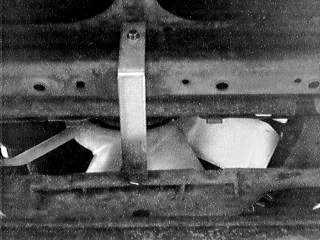
 Install the
parking brake relocation bracket onto the rear of the body mounting flange
just below the drivers door. Use a drill with a 1/4" bit. Relocate the
parking cable above the center body frame mount and connect to the front
parking brake cable. Adjust the parking brake as necessary for proper engagement. Install the
parking brake relocation bracket onto the rear of the body mounting flange
just below the drivers door. Use a drill with a 1/4" bit. Relocate the
parking cable above the center body frame mount and connect to the front
parking brake cable. Adjust the parking brake as necessary for proper engagement.
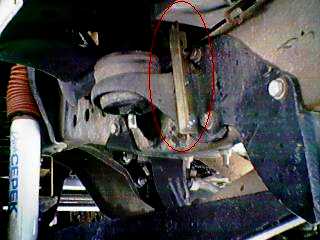
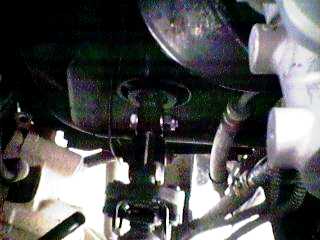 Re-install the
steering extension into the upper steering shaft. Line up the hole in the
steering extension with the hole in the upper shaft. Install a bolt with
a washer through the upper hole in the steering extension. Place a few
drops of permanent Loctite on the threads of the bolt. Install a washer
and nylock nut on the bolt. Do not tighten. Install the lower steering
shaft coupler onto the steering extension, be sure to line up the marks
made earlier on both shafts. Place a few drops of permanent Loctite on
the stock bolt and install through the lower steering coupler and the steering
extension. Tighten both steering extension bolts securely. If the steering
coupler does not fit inside the lower steering shaft, file down the corners
until it fits before you bolt it to the upper steering shaft. Re-install the
steering extension into the upper steering shaft. Line up the hole in the
steering extension with the hole in the upper shaft. Install a bolt with
a washer through the upper hole in the steering extension. Place a few
drops of permanent Loctite on the threads of the bolt. Install a washer
and nylock nut on the bolt. Do not tighten. Install the lower steering
shaft coupler onto the steering extension, be sure to line up the marks
made earlier on both shafts. Place a few drops of permanent Loctite on
the stock bolt and install through the lower steering coupler and the steering
extension. Tighten both steering extension bolts securely. If the steering
coupler does not fit inside the lower steering shaft, file down the corners
until it fits before you bolt it to the upper steering shaft.
Re-install any wires, cables or hoses that were disconnected. Check
all bolts and hardware to ensure that they are tightened securely.
Test Drive
 Take the explorer
out for a test drive and note any abnormalities that may have been caused
by the lift installation. Take the explorer
out for a test drive and note any abnormalities that may have been caused
by the lift installation.
If the steering response is somewhat jerky, www.flaming-river.com
can provide a replacement steering shaft. This will eliminate the shaft
angle created by the body lift.
After 500 miles or one 4-Wheelin' trip, re-check all bolts and hardware
to ensure that they are tightened securely
|

